HTML
<a href="https://instagram.com/" onclick="$(this).attr('href', 'https://www.naver.com')">onclick 시 href 내용이 https://www.naver.com로 로 변경된다.
Port based virtual hosting
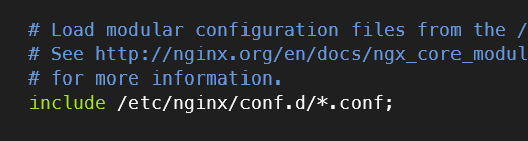
vim /etc/nginx/nginx.conf위와 같이 들어가서 include /etc/nginx/conf.d/*.conf; 확인
vim /etc/nginx/conf.d/vhost.conf위와 같이 vhost.conf 파일 생성(이름은 관습에 따른 것임)
server {
    listen 8081; #listen 80 은 생략 가능
    root /web/site1;
}
위 내용 작성하고 :wq!
mkdir -p /web/site1 => 위에서 작성한 root 폴더 생성
echo "<h1>Hello site1</h1>" > /web/site1/index.html => index.html 내용 입력
systemctl reload nginx(또는 systemctl restart nginx) => 새로 입력한 설정 파일 반영
확인하기
- curl 192.168.~ :8081
- 크롬에서 192.168~ :8081
vhost.conf 파일 내용 아래와 같이 변경
server {
    server_name site1.com;
    root /web/site1;
}
vim /etc/hosts
127.0.0.1 site1.com위와 같이 도메인 처리
systemctl reload nginx
확인하기
- curl site1.com
- 크롬에서 http://site1.com
node_hello_1 이미지를 8081 포트로 실행
docker run \
    --name=node \
    -p 8081:8080 \
    --rm \
    -d \
    node_hello_1
vim /etc/nginx/conf.d/vhost.conf에 아래와 같이 내용 추가
server {
    server_name site2.com;

    location / {
        proxy_pass http://127.0.0.1:8081;
        proxy_set_header Host $host;
        proxy_set_header X-Real-IP $remote_addr;
        proxy_set_header X-Forwarded-For $proxy_add_x_forwarded_for;
        proxy_set_header X-Forwarded-Proto $scheme;
    }
}
systemctl reload nginx
확인하기
- curl site2.com
- 크롬에서 http://site2.com
MariaDB 이미지 실행
docker run \
  --name mariadb_1 \
  -d \
  --restart unless-stopped \
  -e MARIADB_ROOT_PASSWORD=비밀번호 \
  -e TZ=Asia/Seoul \
  -p 3306:3306 \
  -v /docker_projects/mariadb_1/conf.d:/etc/mysql/conf.d \
  -v /docker_projects/mariadb_1/mysql:/var/lib/mysql \
  -v /docker_projects/mariadb_1/run/mysqld:/run/mysqld/ \
  mariadb:latest
docker exec -it mariadb_1 /usr/bin/mariadb-secure-installation => 보안 설정
- Switch to unix_socket ... n
- Change the root password ... n
- 나머지 y
docker exec -it mariadb_1 mysql -u root -p => 계정 생성
- GRANT ALL PRIVILEGES ON ~
CREATE DATABASE nginx;
exit
SQLyog에서 위에서 생성한 계정으로 접속(포트 3306)
@LazyCollection(LazyCollectionOption.EXTRA)
- 어떠한 속성에 대한 값만 필요할 때, 객체 전체를 가져올 필요는 없을 때
- count(), contains()로 접근할 때
'프로젝트 & TIL > 일별 공부 기록 (백엔드 스쿨)' 카테고리의 다른 글
| 39일차 - 자바 문법 심화 개요, hashcode(), List.of() (0) | 2023.04.17 |
|---|---|
| 38일차 - 프로젝트 진행 시 참고 사항, PasswordEncoder (0) | 2023.04.14 |
| 36일차 - 도커 허브에 내가 만든 이미지 업로드, 다운로드 (0) | 2023.04.12 |
| 35일차 - 도커 볼륨, 이미지 생성 (0) | 2023.04.11 |
| 34일차 - 도커 포트포워딩, 도메인 (0) | 2023.04.10 |


